The Basics: Throwing Off the Hump
Introduction
‘Throwing off the hump’ is an informal term for a throwing technique used to create many identical forms in a short period of time using one wedged cone of clay. It’s traditionally associated with Eastern pottery traditions in Japan and Korea. Our founder, Harry Holl, created a basic guideline in the 1960s that we are happy to share with you below. In addition, you can follow along with video demonstrations. In these videos Master Potter Kim Holl will demonstrate how to make a cup, ‘off the hump’.
Rough Center
First, a spiral-wedged piece of clay is placed point first at the center of a dry wheel. Without activating your wheel, smack the top of the clay downwards in even increments, twisting the wheel manually with the force of your slapping movements to ensure the even distribution of clay. Do this until you have slapped the clay into a shape resembling a rough ant hill.
Perfect Center
Start the wheel. While it spins use a sponge to release water over the roughly centered mound of clay. Next, using the base of the palms, exert a firm force against the sides of the mound and bring your hands upward to meet at the top. This will help the clay rise and start to center the clay mound. Make sure the force exerted rises upward at a 45 degree angle.
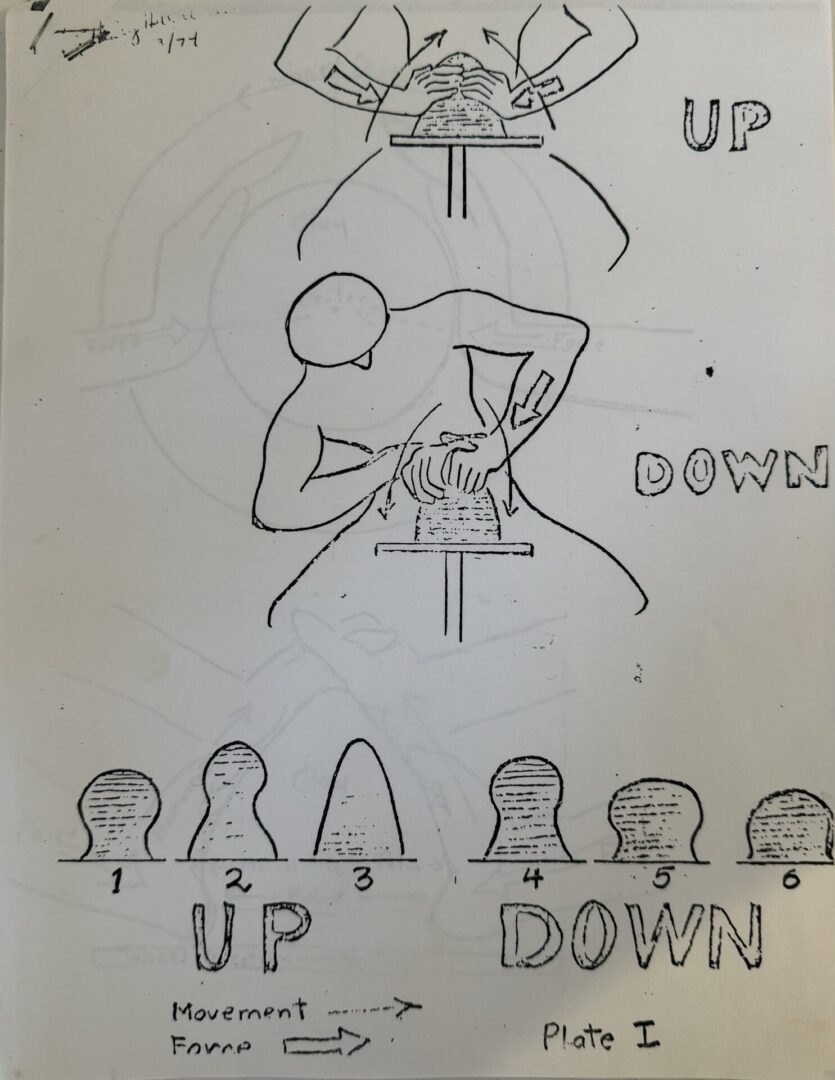
At the top of the clay, interlock your thumbs and press downward to compress the clay. Then, repeat Step 1 until your piece resembles a tower.
Forming the Knob
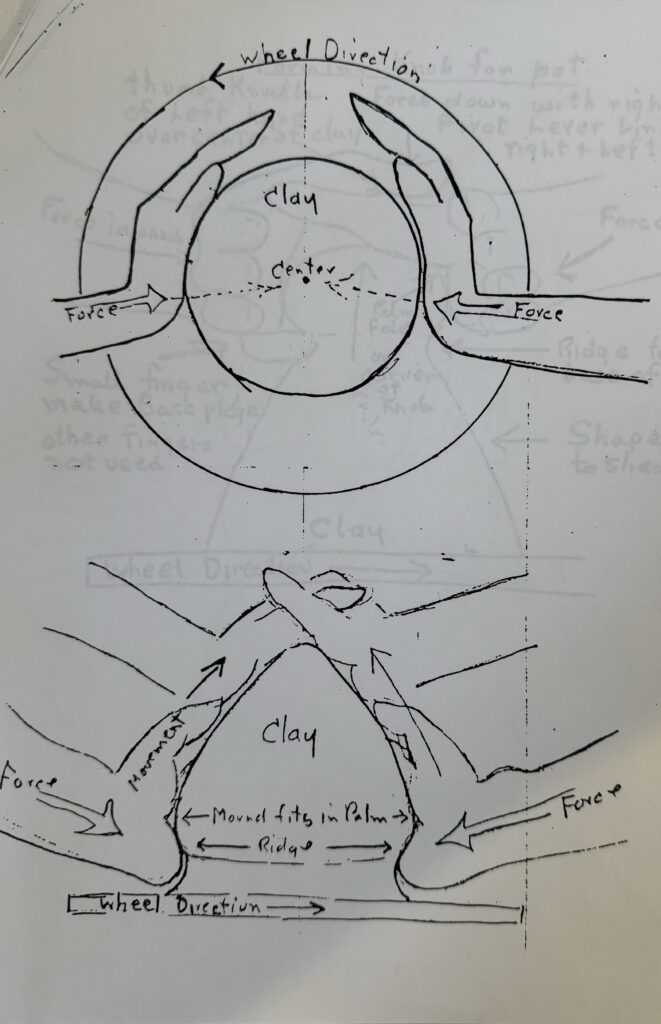
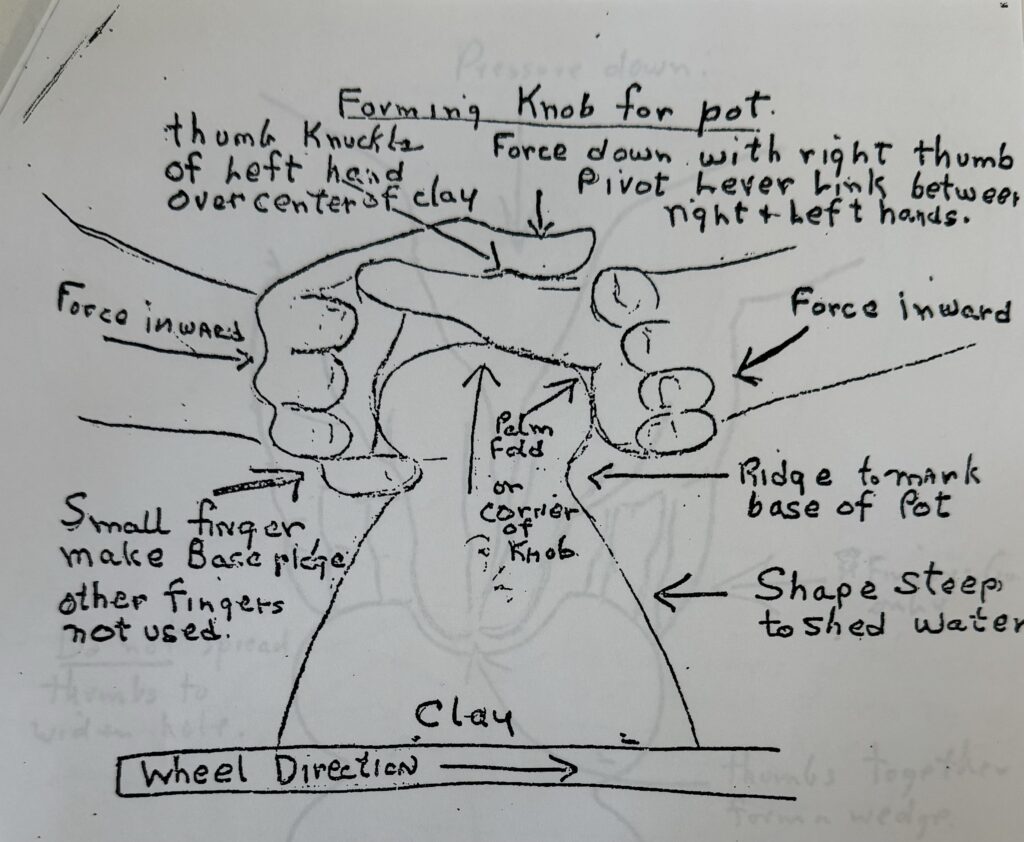
To begin throwing, you first need to form the knob. Position your hands so that your pinkies are below the top of the tower. Gather your palmful of clay and slowly bring it upwards. To accentuate the knob, exert an inward force with your pinkies at the bottom of the knob where you want the floor of your piece to be. Be sure to flatten the top of the knob with the large muscle below your thumb at the end.
As you get better at this, you will see that the shape of the knob significantly impacts the quality of the throw. In this video, Kim is beginning to make a cup.
Dig! and Spread
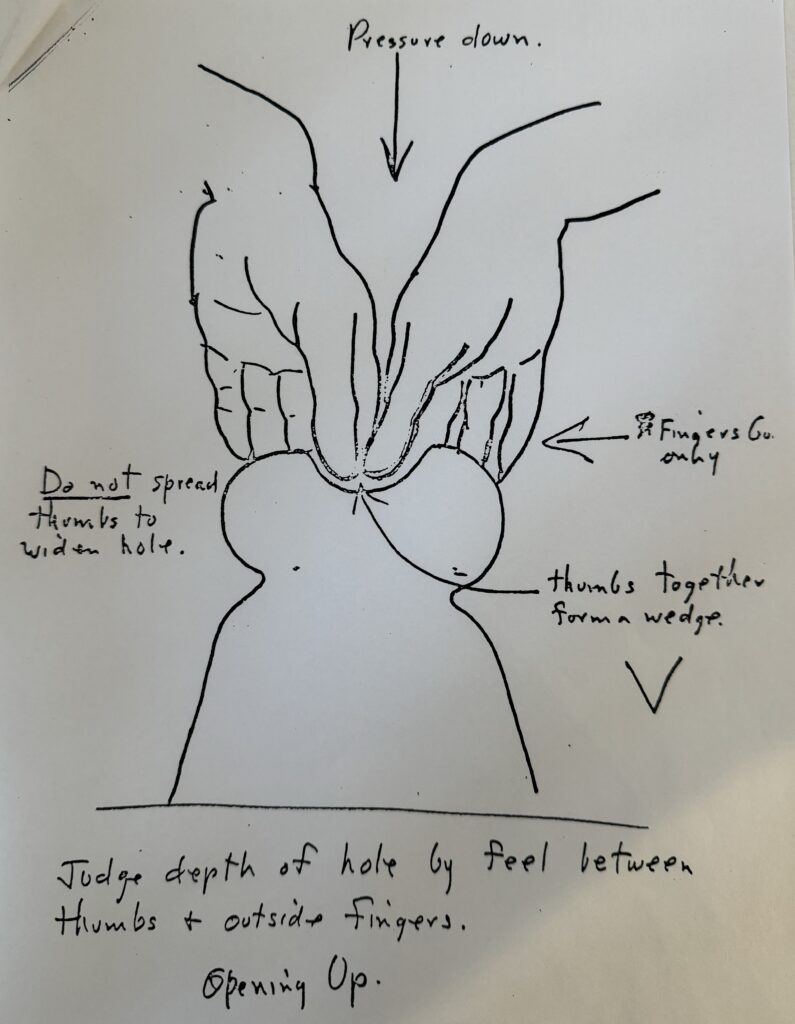
Connect the length of your thumbs and form a ‘V’. Stay connected by gently placing your forefingers on the backside of the knob where the floor of your piece begins. In one smooth motion, press straight down into the clay until your thumbs are even with your fingers. With your thumbs still in the clay gently pull them apart to create a larger opening. Pull your thumbs out.
First Pull Up
One hand is used to cup the rim of your rough shape and the other is used as a guide to start leading your clay to the desired shape. The pressure is exerted by the hand cupping the rim. Grip the clay (like a lobster might) and squeeze as you pull that hand upward.
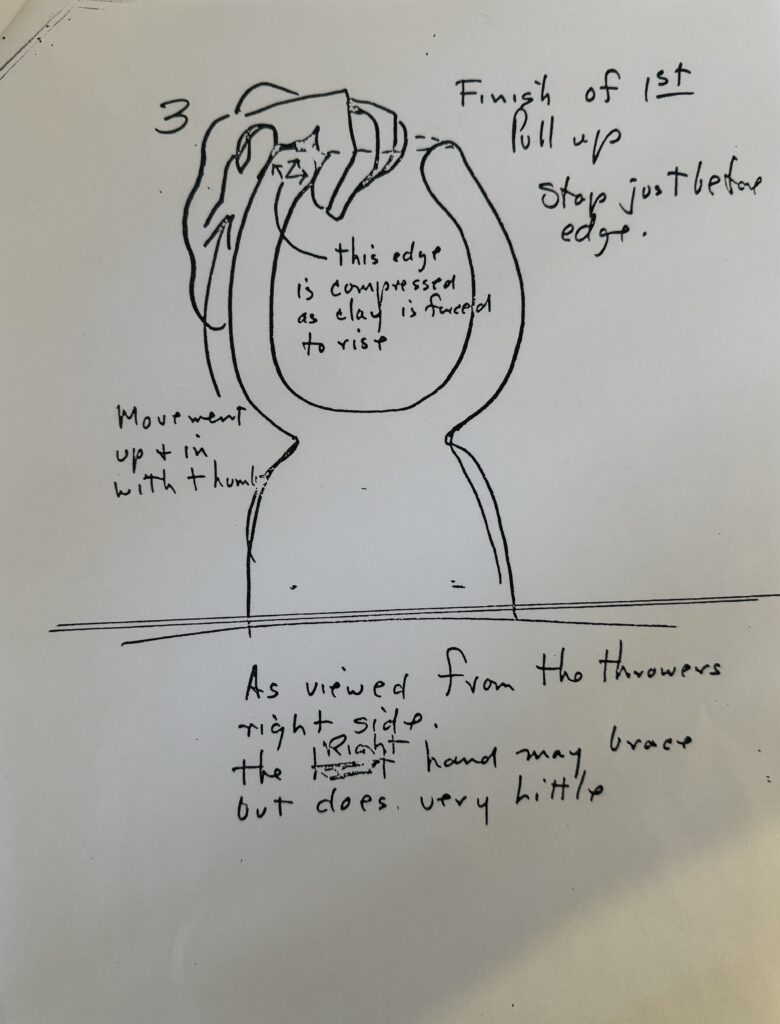
Before pulling the walls of her piece upward, Kim slides her fingers across the floor of the piece – compressing the clay and establishing the base. Leaving clay along the floor of your piece, and at the junction where your walls begin to rise, will leave your piece heavy and susceptible to S-Cracks.
*Pro Tip
Before beginning the second pull up you will need to choke the bottom of the piece. This helps to define the bottom of your piece. It also helps prevent S-Cracks. S-Cracks are responsible for the cracking of many pieces and can be prevented by remembering to compress the clay at the bottom of each piece. In the next video you will see Kim choke her piece before beginning her second pull-up.
Second Pull Up
Form the ‘V’ with your thumbs again. Your hands should always be connected, working in unison to ensure consistency in your piece’s walls. Insert your hand into the piece, and with your middle finger pull the clay out to widen your floor even more until it connects with the middle finger of your opposite hand . Once both fingers are connected, pull the clay up. Due to the centrifugal force of the spinning wheel, the clay will always want to become a plate. Make sure to exert sufficient and equal force with your fingers to pull the clay upward.
Notice how her fingers stay connected. Also, the clay is pulled upward in one continuous motion. Any stoppages or unsteadiness can result in an uneven distribution of clay along your walls.
Tool Pull Up
Repeat the steps from the second pull up, but this time, connect your inside finger to the tool held in the hand on the outside of the clay. Use this technique to further refine your piece’s shape and remove any unseemly ridges in the side of your piece from the prior pull ups.
The first movement with the tool establishes a consistent thickness. Kim continues to keep her hands connected, working from the inside-out. When she reaches the floors junction, she angles the tool to create an angled edge. This makes it easier to lift the piece from the hump of clay.
The second movement with the tool works to definitively shape the piece. In the video, Kim adds a ledge near the top of her mug, separating the mouthpiece from the base. Notice how she turns the tool vertically and keeps pressure on the wall with her inside hand.
*Pro Tip
Before starting each new step, coat the walls of your piece in water so your fingers can slide upwards better. Use your dry sponge to remove water from the bottom of your piece when there is too much build up. Before cutting your piece remove the water from the inside.
Cut Off and Pick Up
At Scargo we use a handmade wooden tool that allows us to define the floor of our piece and cut the piece from the hump (below). These tools can be bought at a variety of pottery supply stores. The floor is defined at a 45 degree angle to leave room for cutting and trimming a foot. Flick the string through the piece evenly to make future trimming easier.
Conclusion
There are a million different variations to this process, and after practicing these steps over and over again you will start to find a style that suits you. Don’t get discouraged, it takes thousands of attempts to become proficient. It is best to start with small shapes, and practice the steps exactly as they are listed. Replicating one shape over and over again is a sure fire way to see rapid improvement. Remember to work towards your desired shape immediately. Be patient, be persistent, and good luck! If you have any other questions, drop them in the comments section below.
Written and Edited by: Cole Vincenzi